Jobs
Overview
Jobs are the primary operational records in FieldWRX. A job captures the customer, work site, services, schedule, personnel, vehicles, equipment, consumables, contacts, attachments, notifications, and review tasks for a field job.
Use the Jobs area when you need to plan field work, dispatch crews, review progress, or confirm that completed work has the details needed by invoices, payroll, usage review, and reporting.
Job List
The job list helps dispatchers and coordinators find the work that needs attention. Search by job number, customer, work site, description, or location/well name. Use filters to narrow the list by customer, rig, status, services, or date range.
Create a Job
Create a job when new work needs to be planned or tracked.
Confirm the core operational details:
- Customer and related contacts.
- Job template.
- Start date and start time.
- Services.
- Work site type and required work site details.
- Dispatched-from business unit when your organization has multiple business units.
- Employee notes and internal notes.
- Personnel, vehicles, equipment, and consumables.
- Attachments and notification groups.
Save mode:
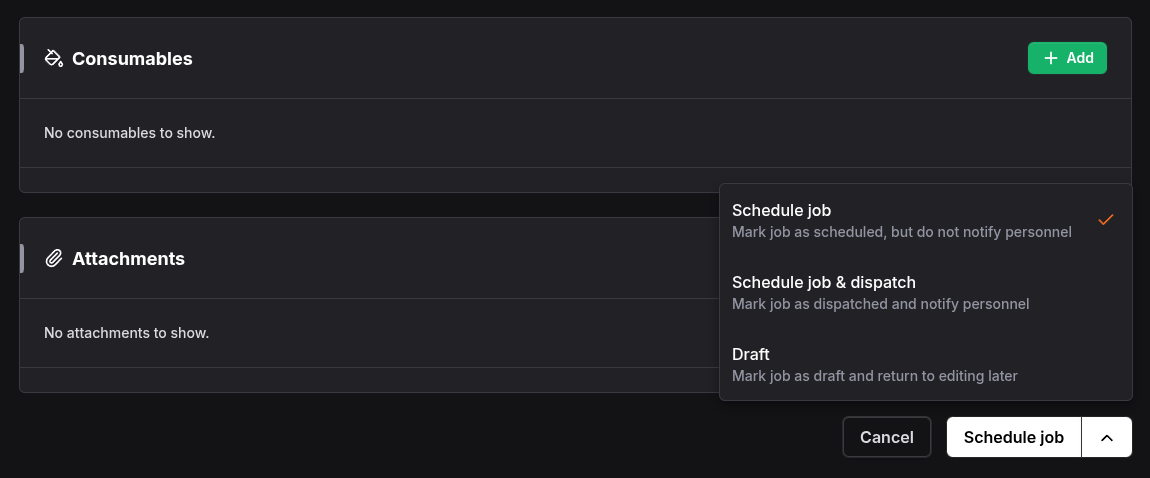
When saving a new job, choose the mode that matches how ready the work is:
- Schedule job marks the job as Scheduled, but does not notify personnel.
- Schedule job & dispatch marks the job as Dispatched, notifies personnel, and assigns equipment to that job.
- Draft creates the job with minimal information so you can come back to it later. Only customer and job template are required to save a job as a draft, so you can fill in the rest of the details when you’re ready.
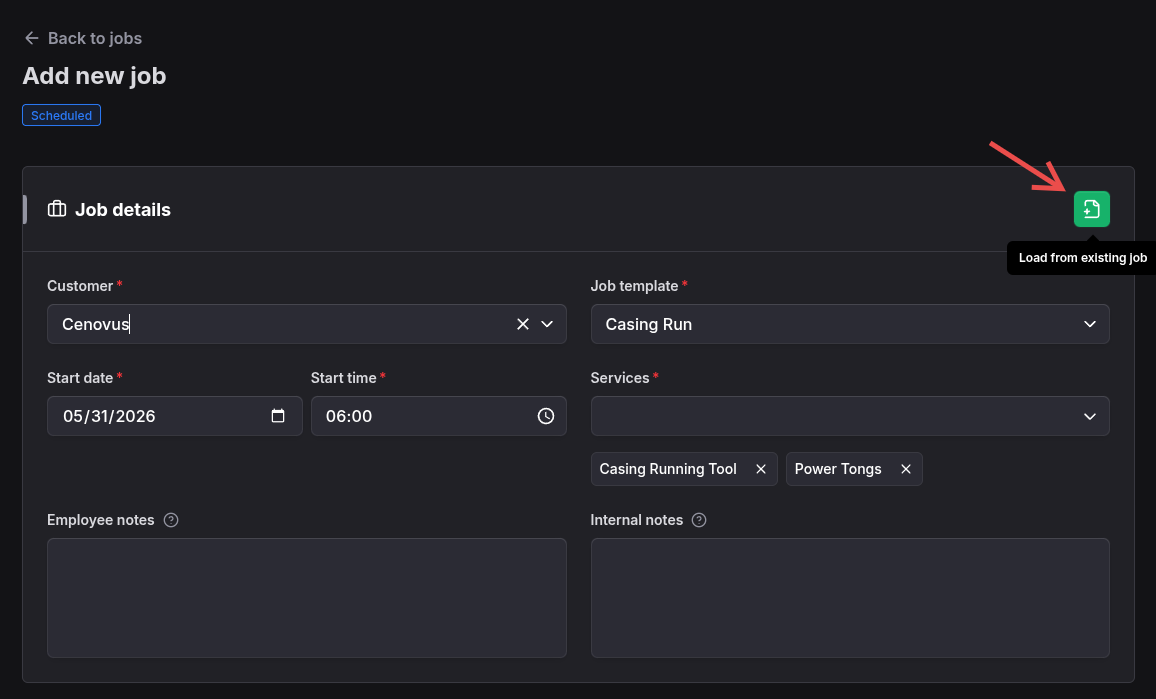
Load from existing details
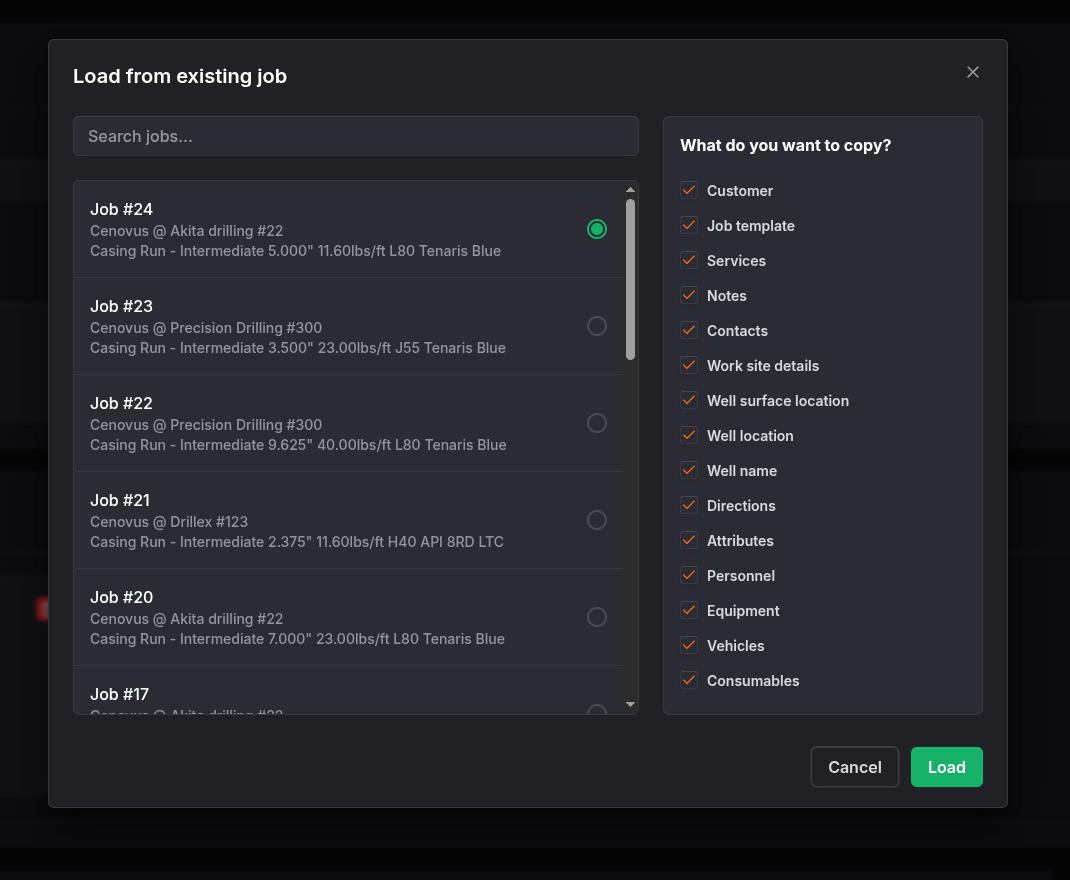
When a job shares details with an existing job, load those details to save time and ensure consistency.
Select the existing job you want to use as the source, then choose which details should be copied into the new job.
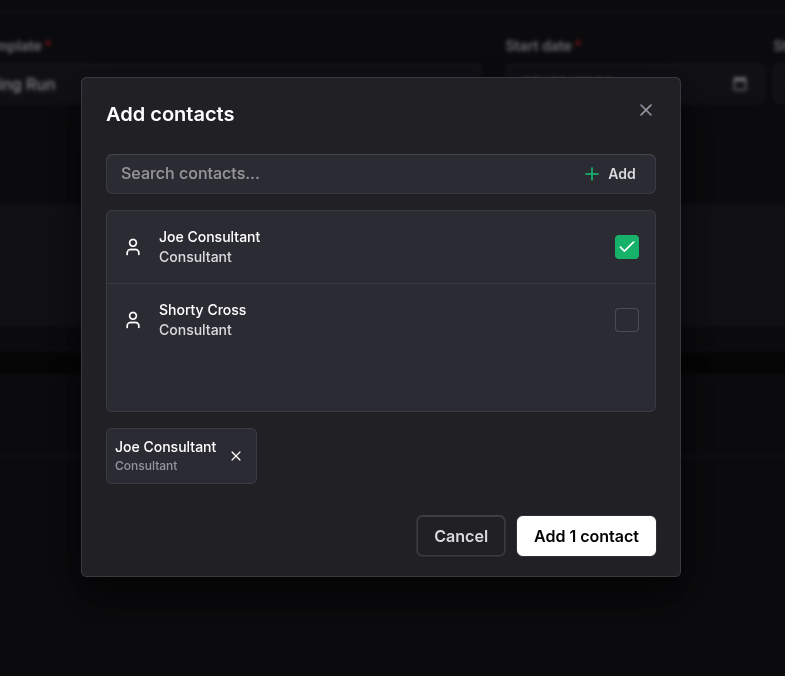
Contacts
Add a contact from the work site. When a contact is added, it will be displayed on the external job page that employees receive from the dispatch ticket email. This helps field crews know who to contact at the work site if necessary. This information will also be available in the job details and invoice creation page for internal users to reference.
Work Site Details
The work site type controls which location details are required. FieldWRX supports work sites such as physical addresses, facilities, rigs, and well sites.
For rig work, select the rig. For physical address or facility work, enter the required work site name and address details. For well site work, capture the relevant well location fields such as DLS, PLSS, GPS, UWI, API number, well name, surface location, directions, and coordinates when applicable.
To complete work site details:
- Select the correct work site type.
- Enter the required fields for that type.
- Add directions when the field crew needs more context than the address or well location provides.
- Confirm well location details are in the right system before dispatch.
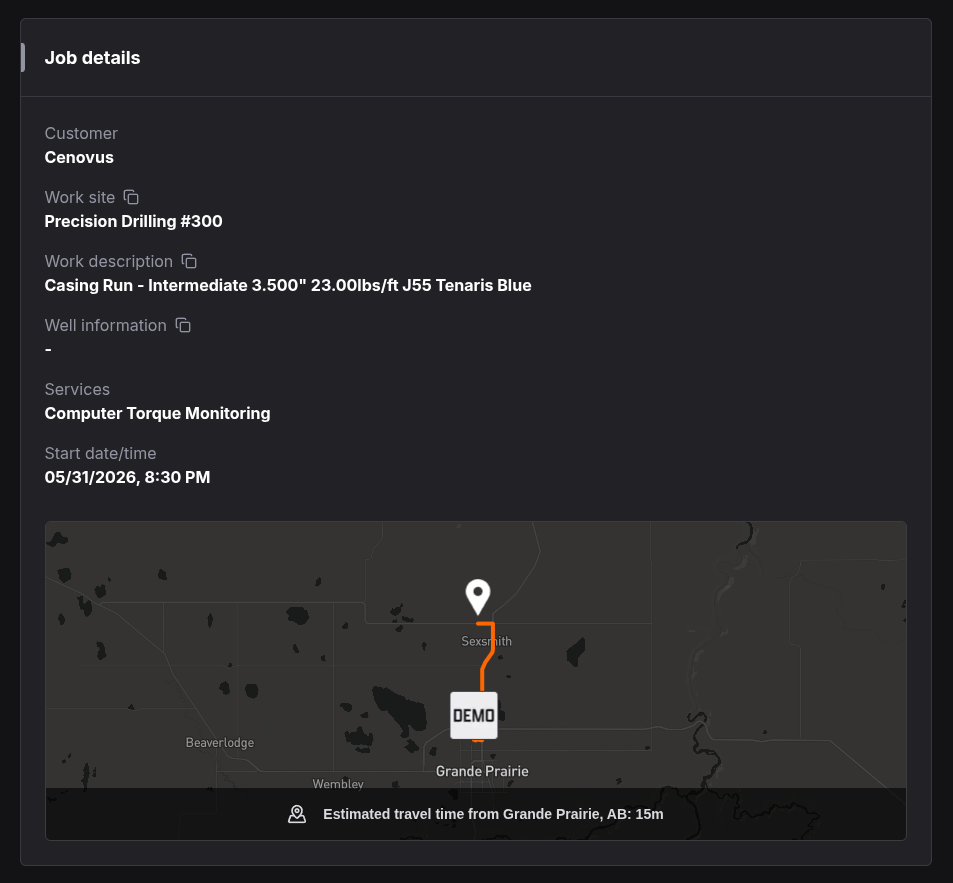
Map visibility: When a job uses the DLS location system and a surface location is entered, or uses the GPS location system and coordinates are entered, FieldWRX will show the job on the dashboard map, in the job details, and on the external job page employees receive from the dispatch ticket email.
Notifications
There are multiple ways to notify the personnel assigned to the job:
- When creating a job use the menu to select
Schedule job & dispatch. This will save the job status asDispatchedand send notifications to assigned personnel. - When editing a job use the menu to select
Save changes & dispatch. This will update the job status toDispatchedand send notifications to assigned personnel. - Change the job status from Draft/Scheduled to Dispatched and check the
Notify personnelbox in the status change dialog. This will update the job status and send notifications to assigned personnel. - Use the
Send notificationaction in the job list or job details page to send a one-time notification to assigned personnel without changing the job status. This is useful for sending reminders or updates about the job.
Important:
Ensure all personnel have a valid email address in their user profile to receive notifications. If a user does not have an email address, they will not receive any notifications about job assignments or updates.
Job Statuses
Jobs can move through these statuses:
Important:
Make sure all the necessary resources are assigned to the job before marking it as
Completed. You can still add timesheets after completion if you missed any personnel, but equipment, vehicles, and consumables will be locked from further changes.
Job Details
The job detail page is the source of truth for an individual job. It includes tabs for Overview, Documents, Invoices, Timesheets, Usage, and Activity.
To navigate to the job details:
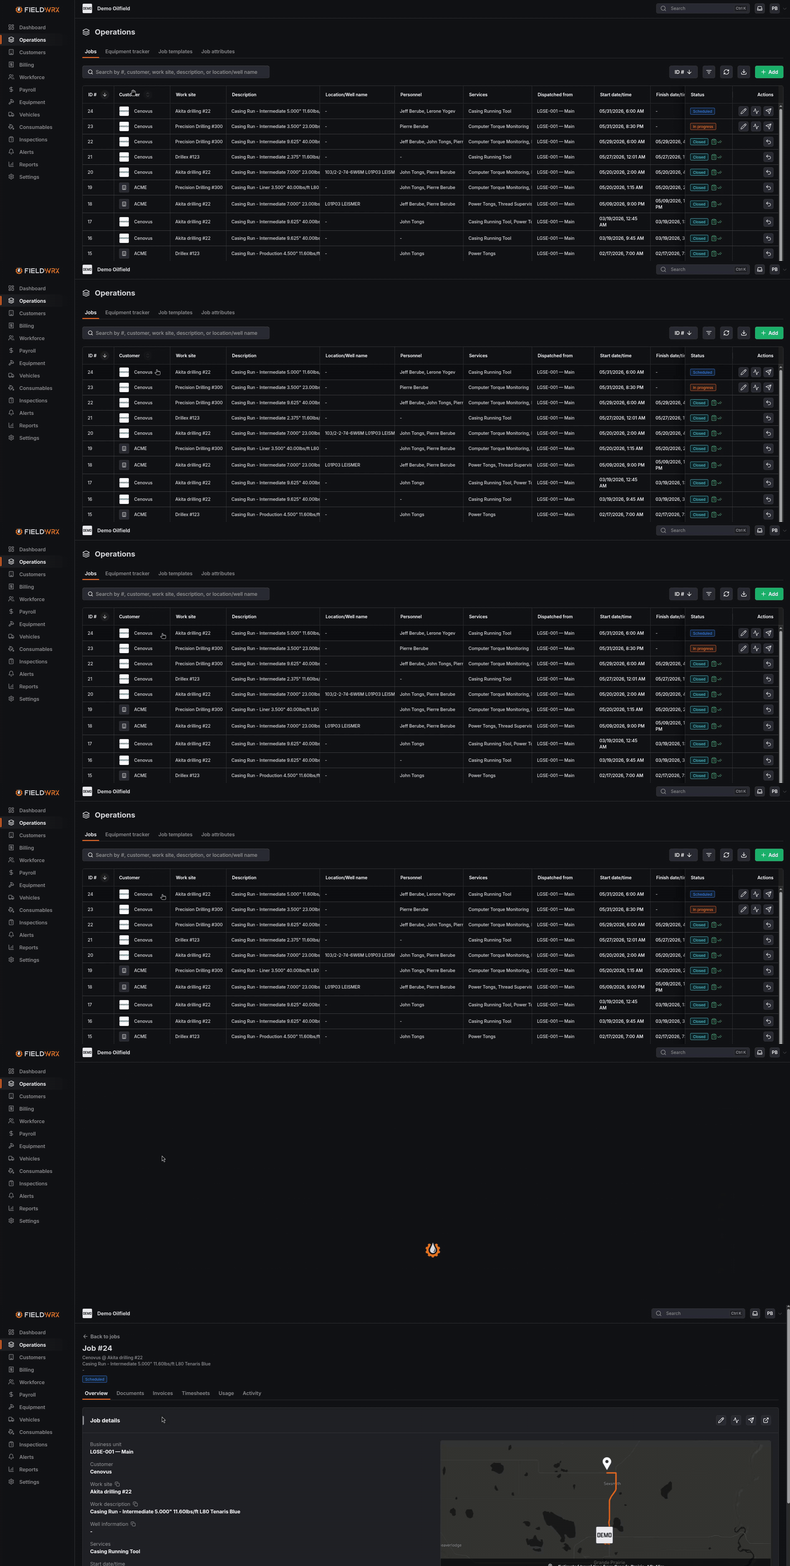
- Open the job list and select the job you want to review.
- Click on the job number or anywhere on the job row to open the job details.
Tasks
Tasks are the action items that need to be completed for the job. They can be assigned to users to help ensure timely completion.
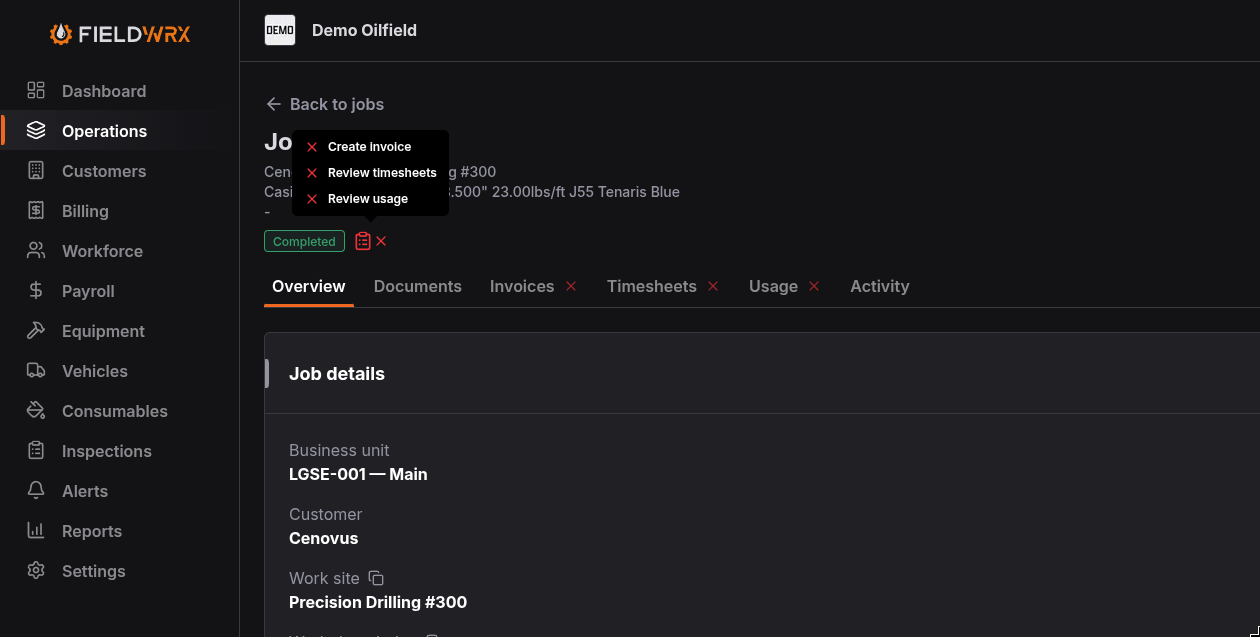
When a job is marked as Completed, it creates review tasks for invoices, timesheets, and usage. These tasks are assigned to the selected users and can be reviewed in the job details under the relevant tabs.
You can quickly see the tasks that need to be completed for a job when hovering over the clipboard icon next to the job status badge.
Documents & Attachments
You can attach documents that can be shared with the field crew or kept internal.
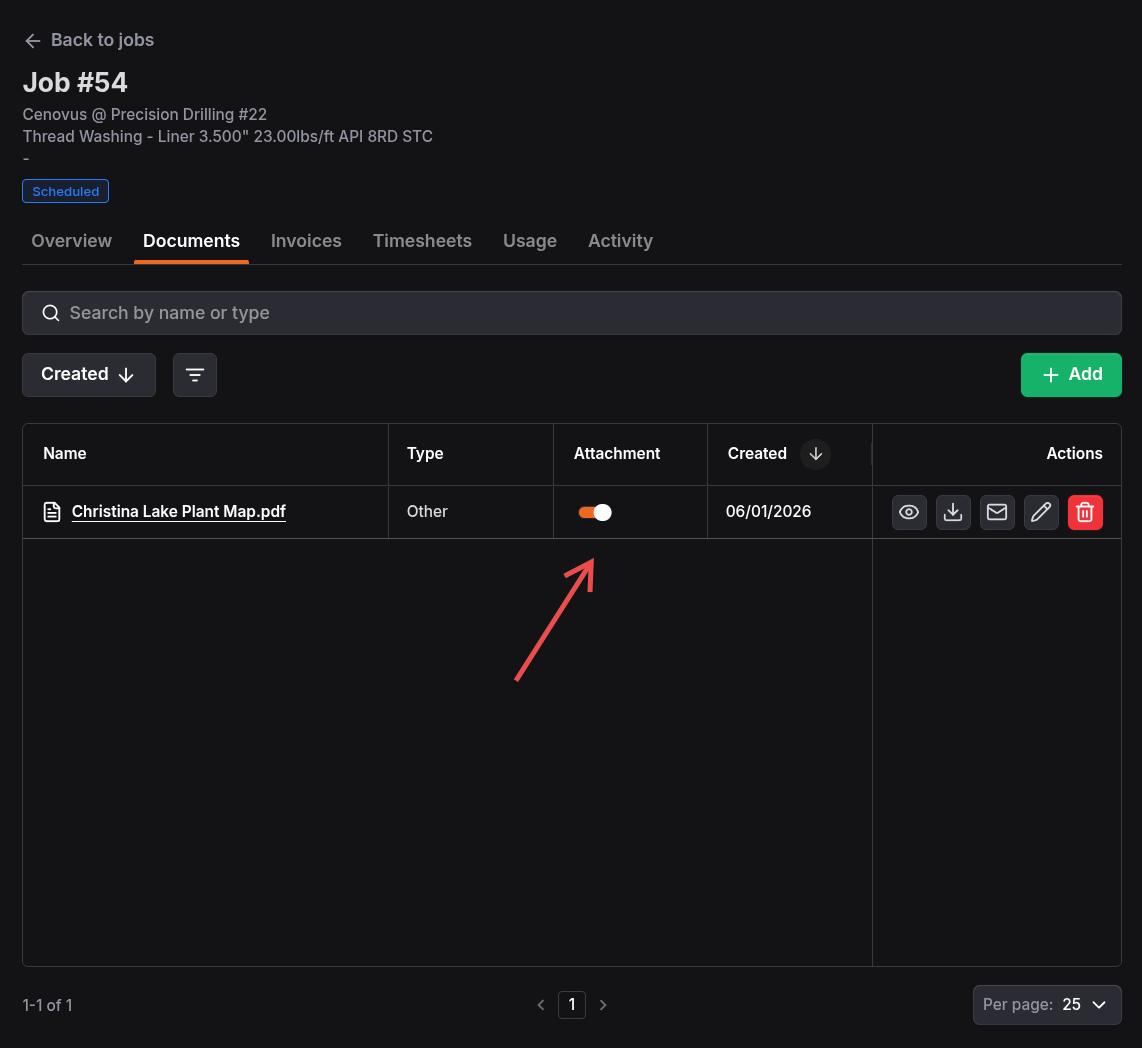
When a document is attached to the job, it will be displayed on the external job page that employees receive from the dispatch ticket email if:
- It is added via the Attachments card in the job form.
- The
Attachmentswitch is toggled on the document in the Documents tab.
Invoices
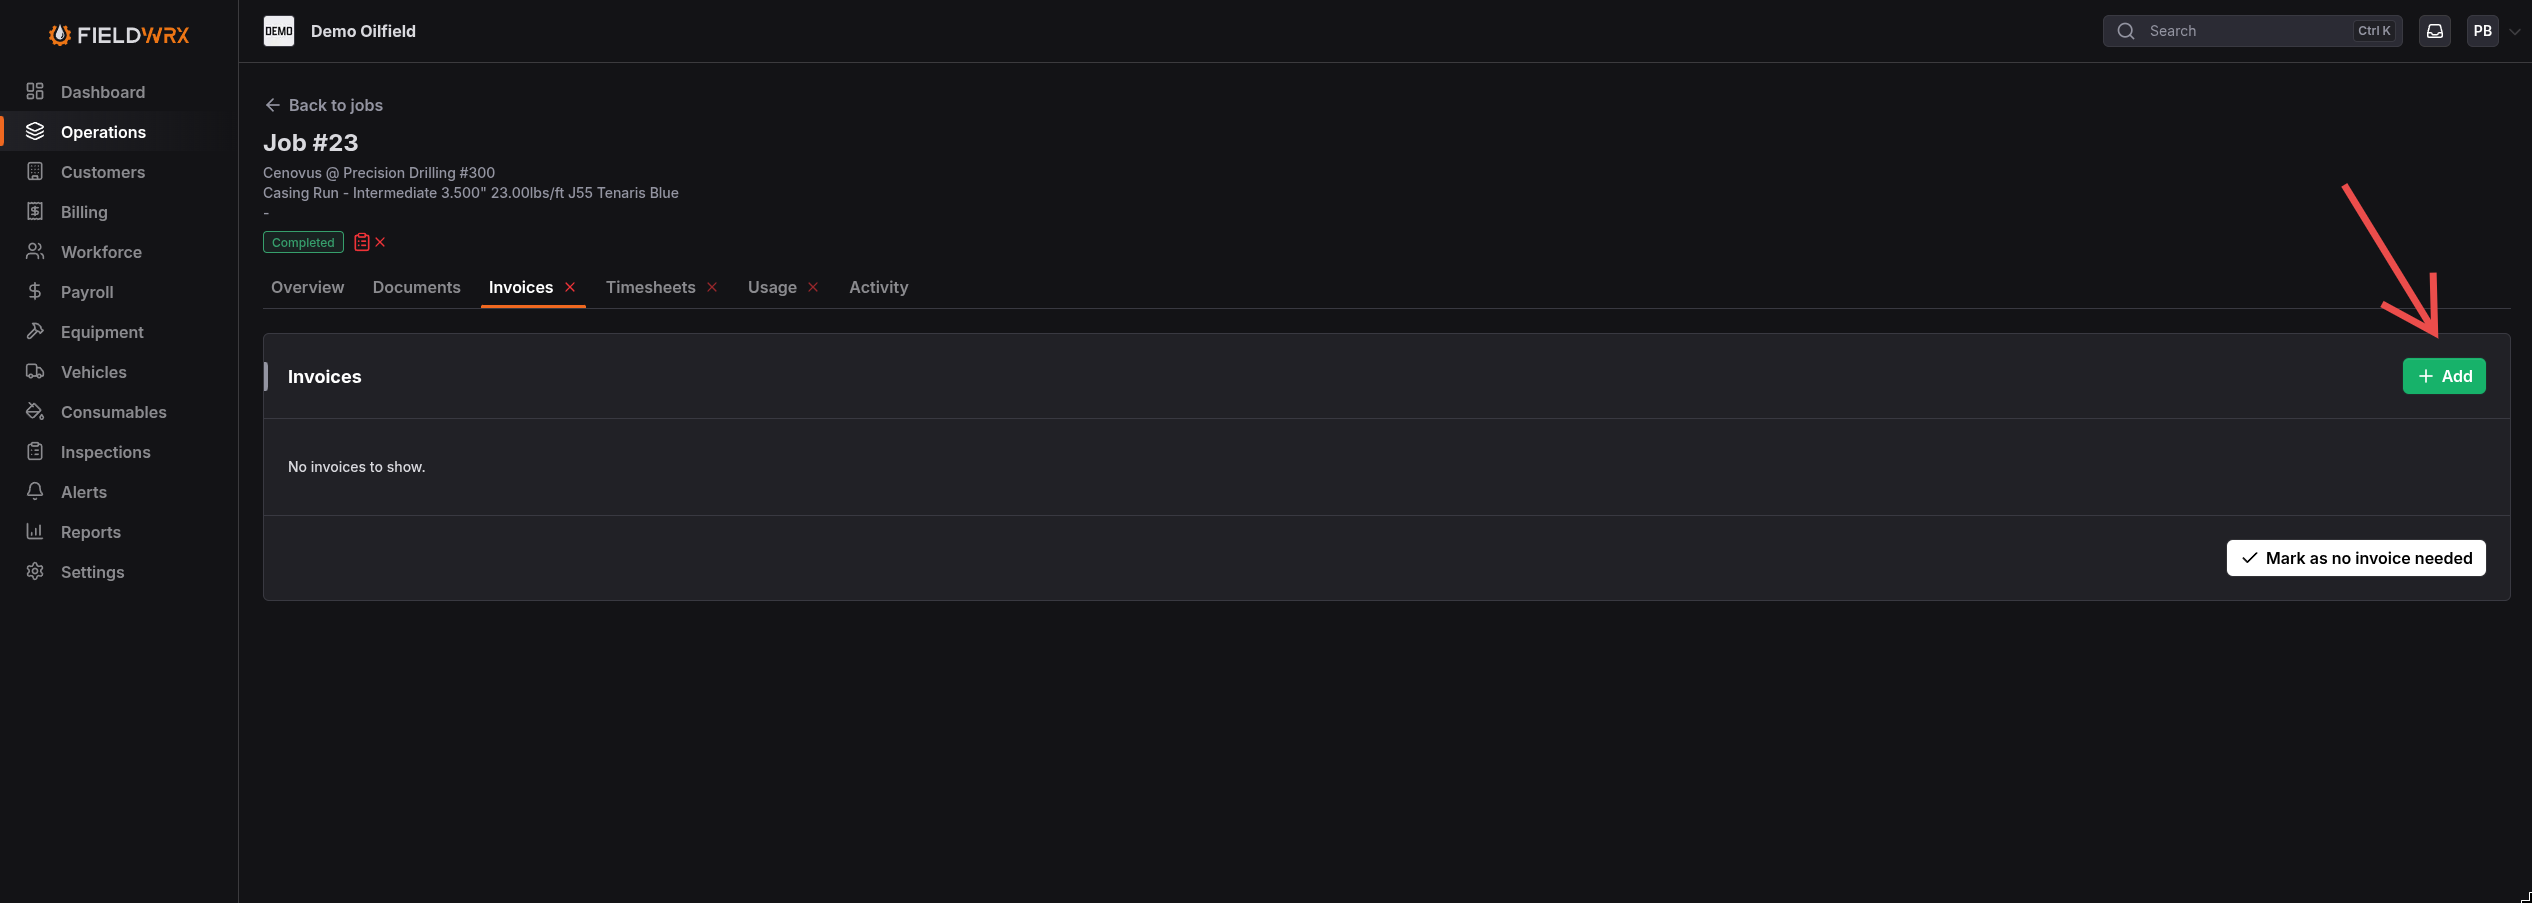
The Invoices tab shows invoices connected to the job and supports invoice review after the job is completed. Completed jobs can create an invoice review task assigned to the selected user.
Use the Invoices tab when a completed job needs to be billed or when billing needs to confirm which invoices already exist for the job.
Associate an invoice with a job
- Change the job status to
Completedand assign the invoice review task to the right user. - Open the job and click on the Invoices tab.
- Click on Add to create a new invoice and connect it to the job.
Mark job as no invoice needed
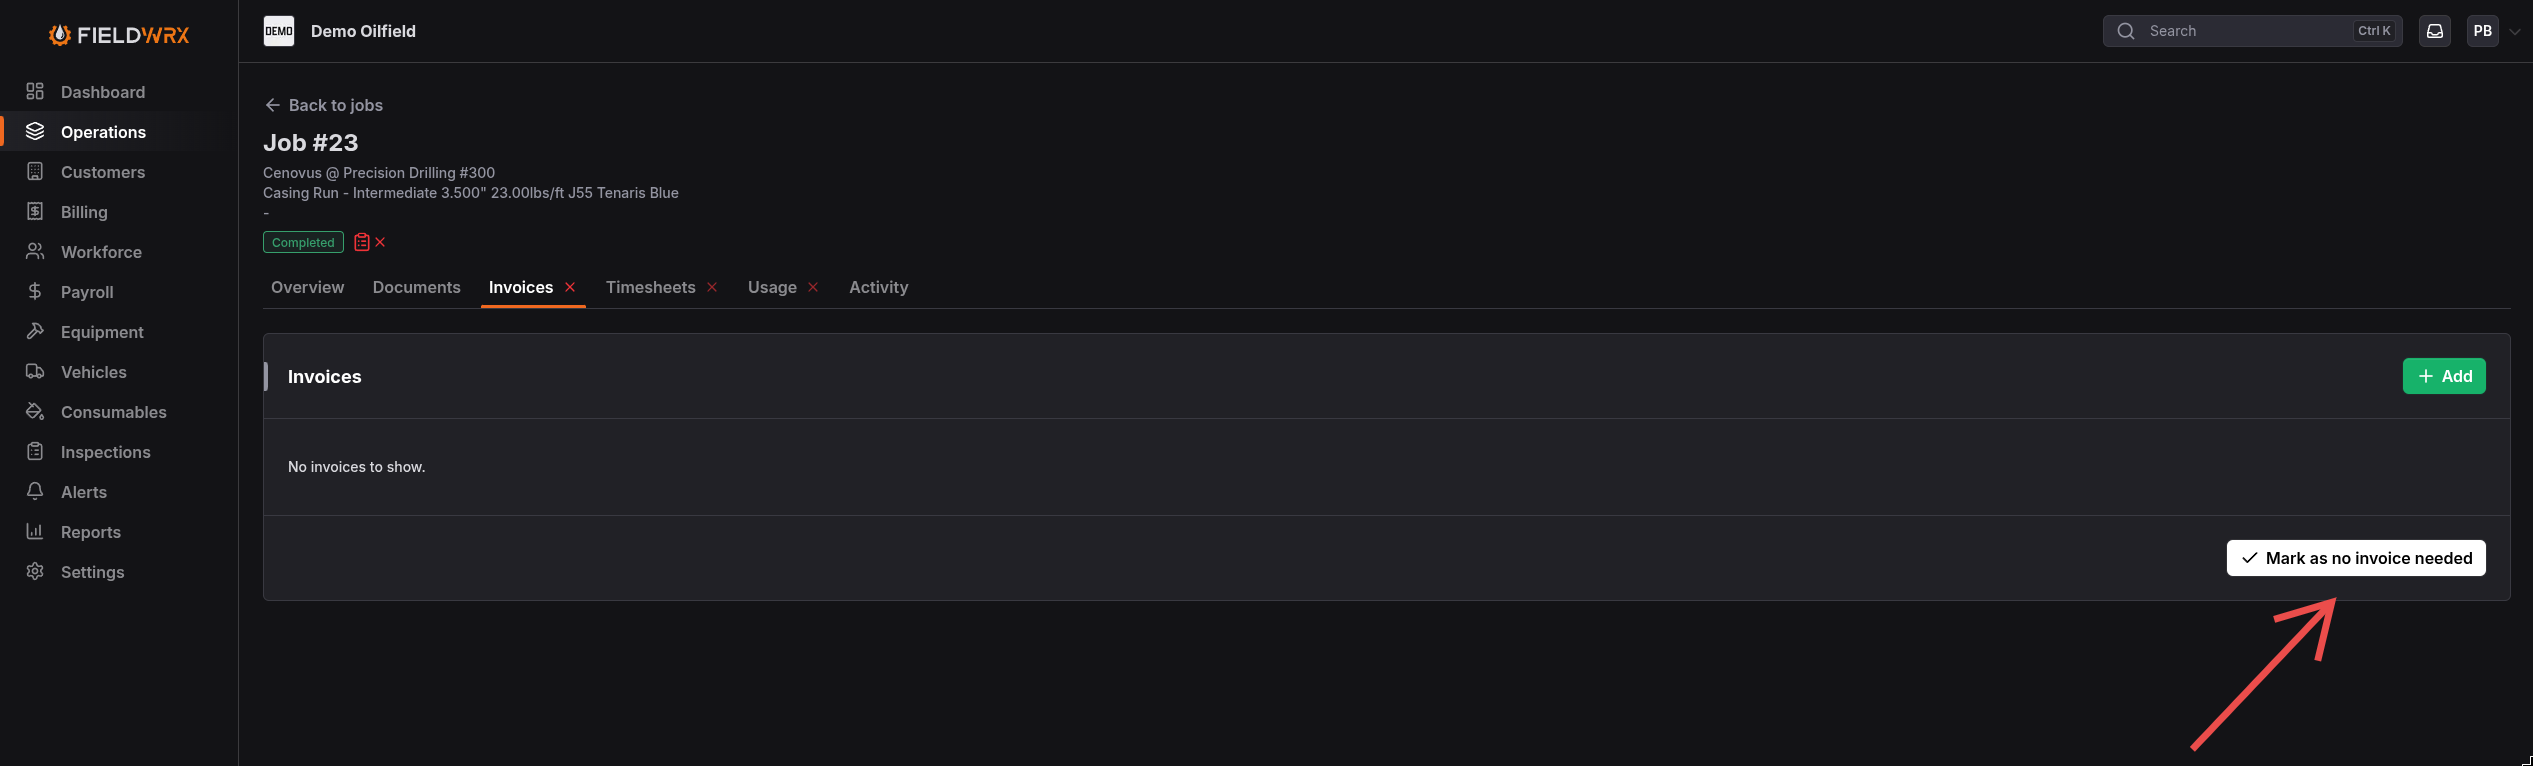
It is possible to mark a job as not needing an invoice when the work does not require billing. This can be done by clicking the “Mark as no invoice needed” button in the Invoices tab. This will close the invoice review task and let you mark the job as Closed without creating an invoice.
Timesheets
Timesheets connect labor activity to the job. They help payroll and operations teams review who worked, when the work happened, and which job the time belongs to.
Use the Timesheets tab after completion to review labor records. Timesheets can still be added after a job is Completed when personnel was missed, even though equipment, consumables, and vehicles are locked from further changes.
Add a timesheet
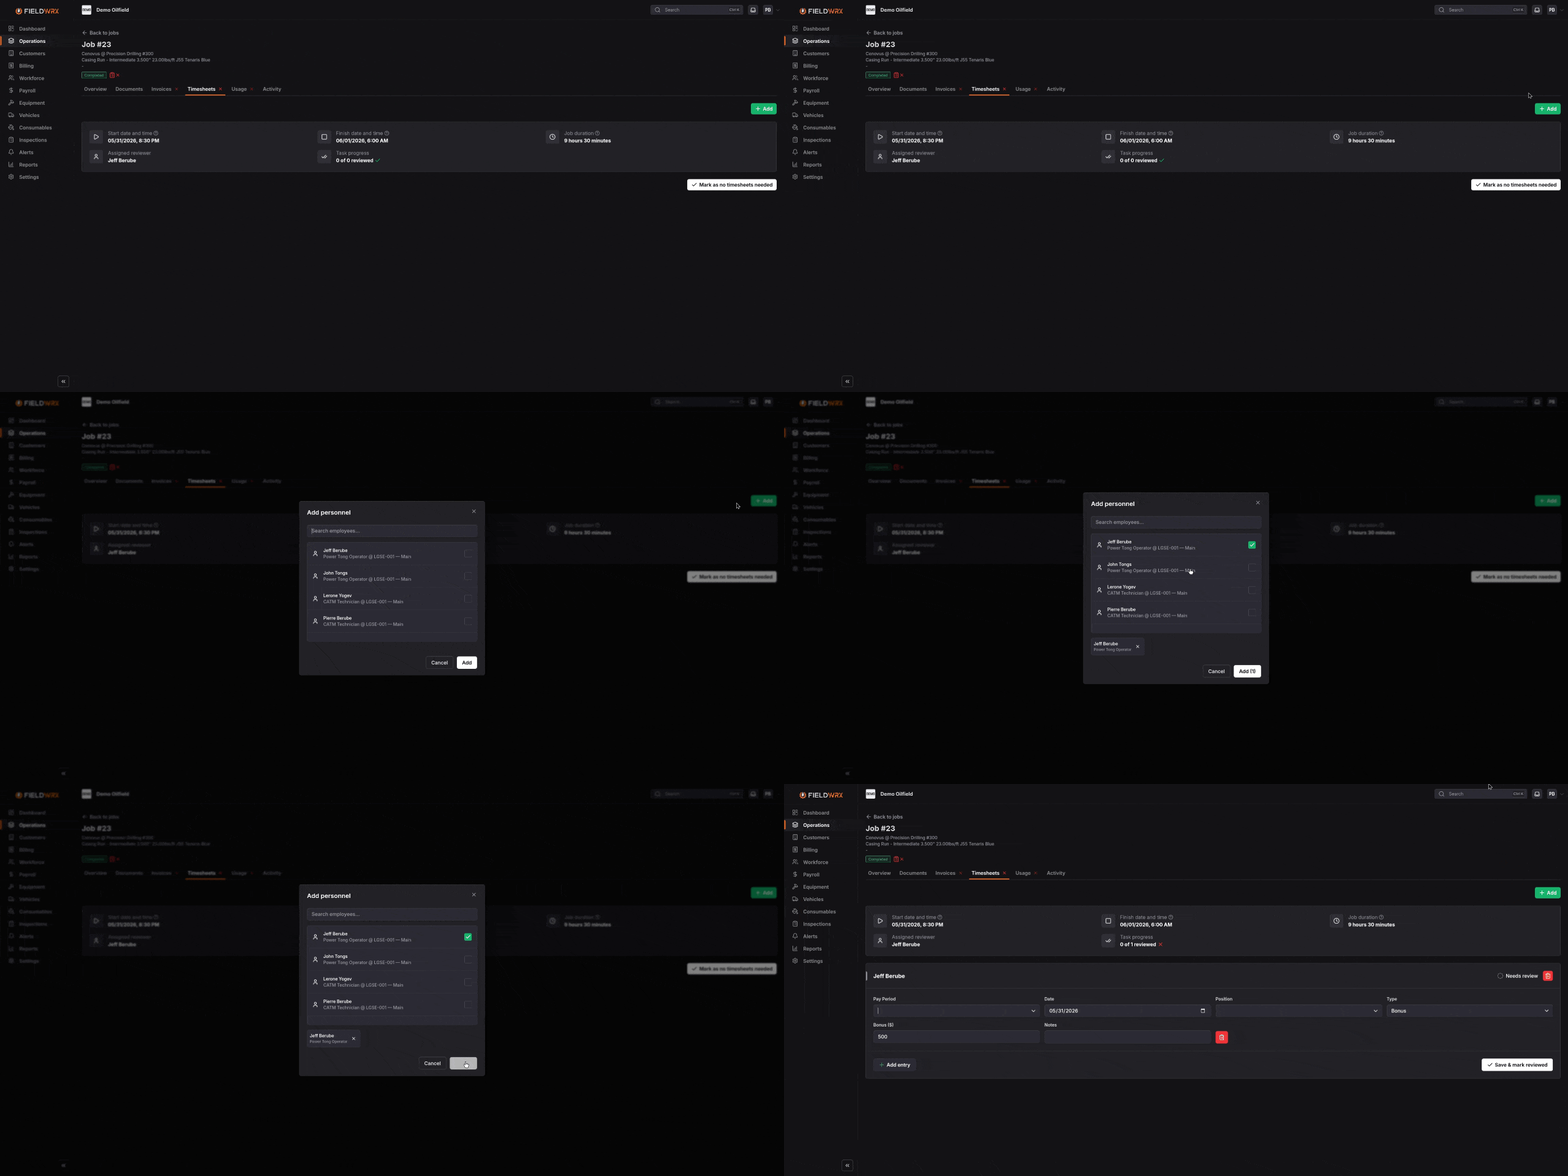
In the event that you need to add a timesheet after a job is completed, such as when personnel was missed, you can still add the timesheet and connect it to the job.
- Change the job status to
Completedand assign the invoice review task to the right user. - Open the job and click on the Invoices tab.
- Click on Add then select the employee in the dialog that appears.
Timesheet availability:
Timesheets only become available for review after the job is marked as
Completed, but they can be added or edited after completion when personnel was missed.
Reviewing timesheets
Timesheets can have one or more entries for a given employee. If a job spans multiple days, you may add more entries for the same employee on different days.
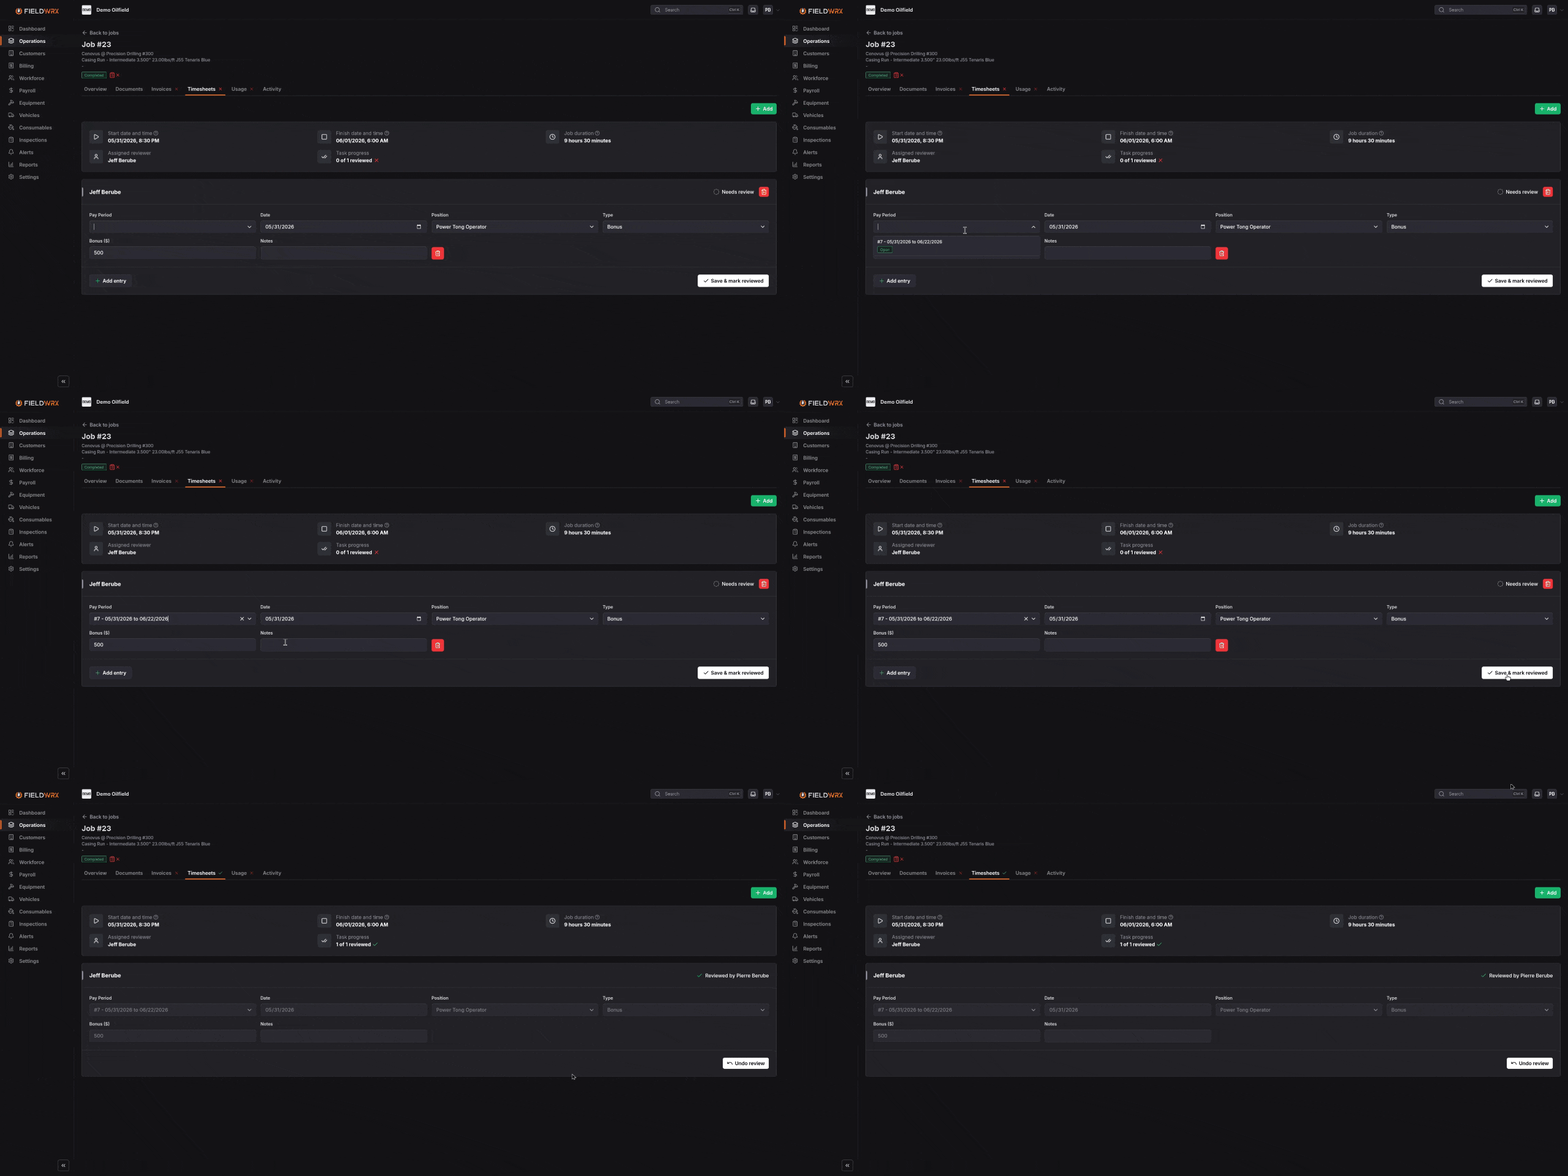
To review a timesheet:
- Open the job and select the Timesheets tab.
- Select the pay period for the given entry.
- The job’s start date will be used as the default date for the timesheet entry, but make sure to update the date if the work happened on a different day.
- Select the employee’s position for the job. The default position will be the employee’s primary position, but make sure to update it if they worked in a different role for this job.
- Select the type of entry. The default will be
Bonus,CommissionorHourly Wagedepending on the employee’s compensation setup.- If the entry type is
Bonus, the employee’s default bonus amount will be prefilled. Make any adjustments as necessary. - If the entry type is
Hourly Wage, enter the hours worked for that entry. The employee’s default hourly wage will be used to calculate the total amount. - If the entry type is
Commission, you will need to select the invoice from which the commission should be calculated. The employee will need to have a commission rate set up in their compensation details for the commission amount to be calculated. The invoice will need to have commissionable items for the commission amount to be calculated.
- If the entry type is
- Optionally, add notes to the timesheet entry to provide more context which will appear on the employee’s pay stub.
- Click on
Save & mark reviewedonce all timesheet entries for that employee are added and reviewed. Once all timesheets are saved and reviewed, the review task will be marked as completed.
Undoing a review:
If you need to make changes to a timesheet entry after marking it as reviewed, simply click the
Undo reviewbutton to make edits. This is only available if the pay period associated with the timesheet entry is still open. Once the pay period is closed, timesheet entries are locked from further changes.
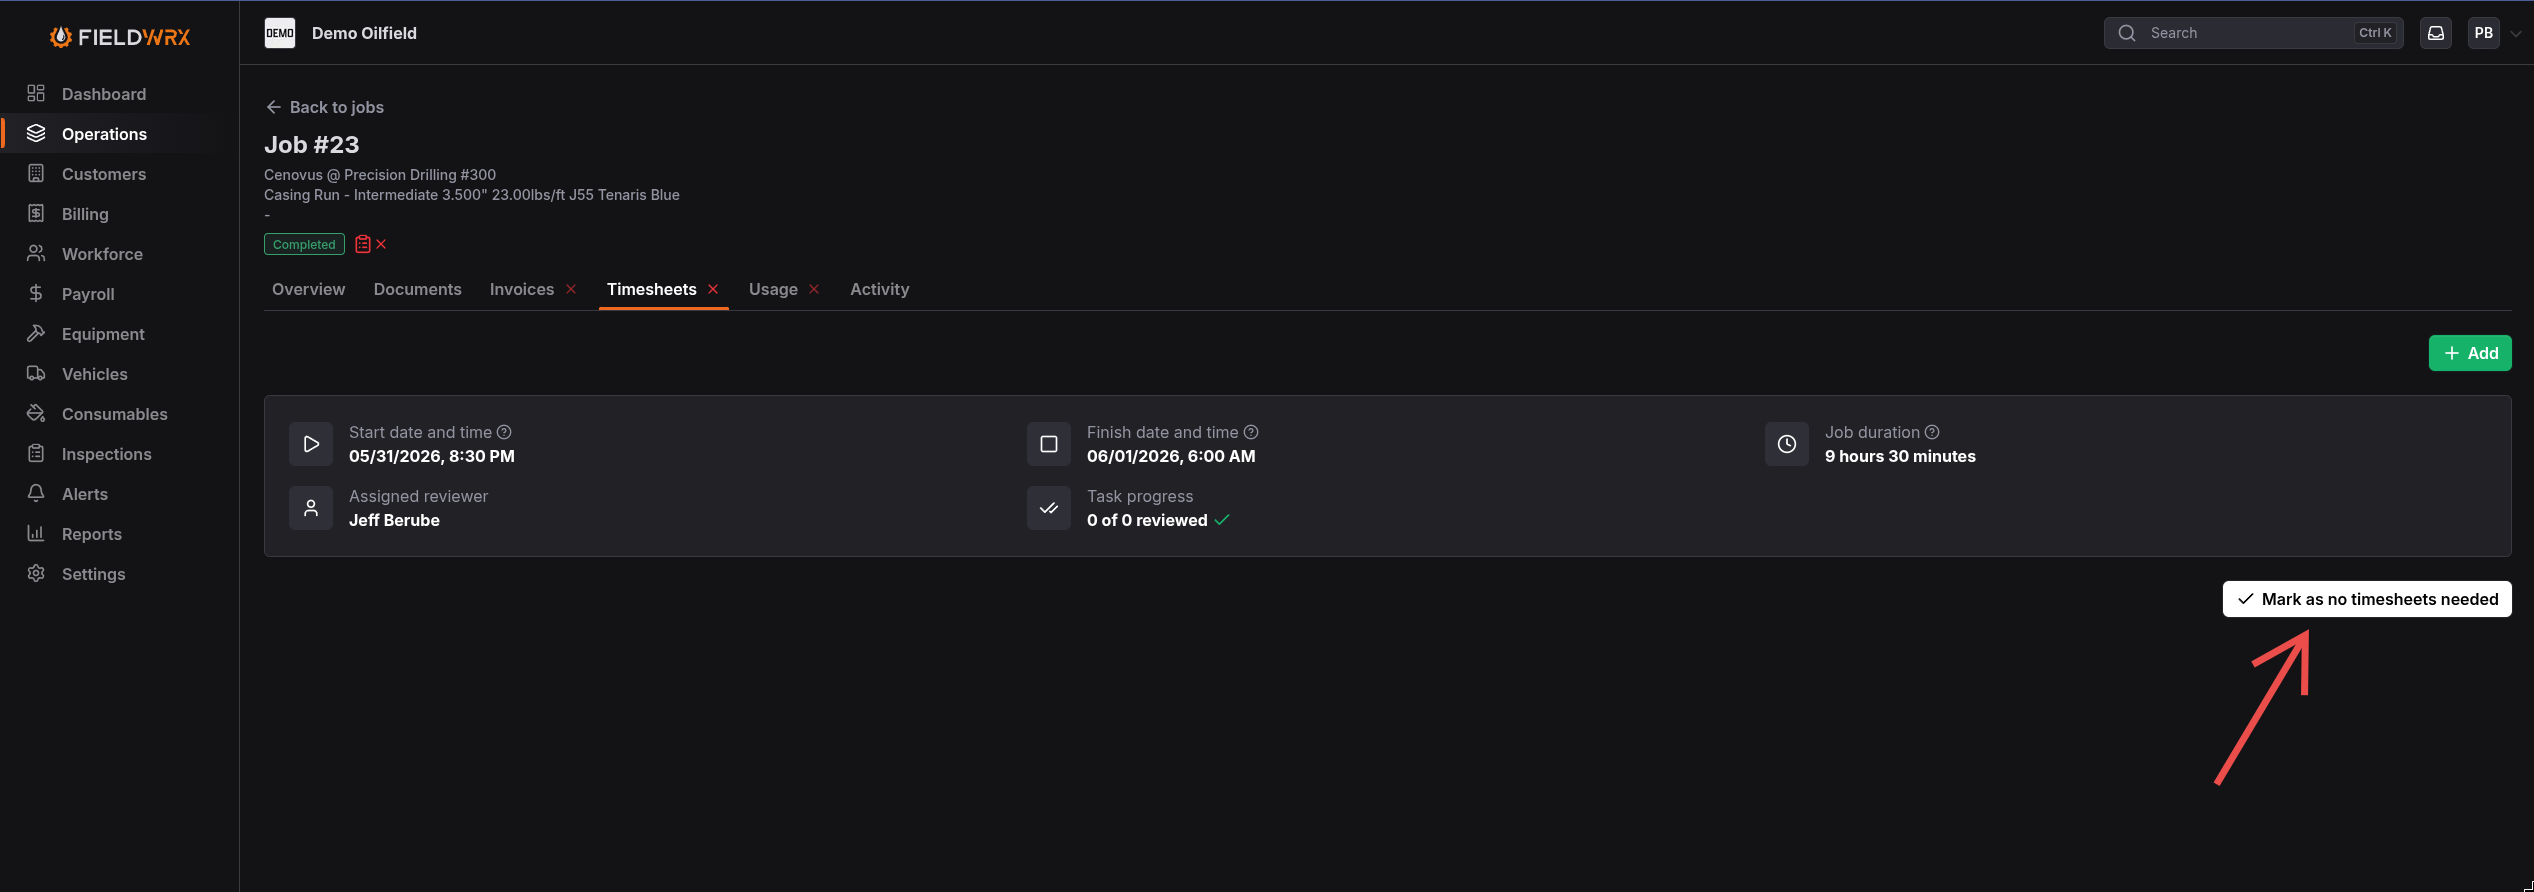
Mark job as no timesheet needed
In cases where a job does not require timesheets, you can mark the job as not needing timesheets. This can be done by clicking the “Mark as no timesheet needed” button in the Timesheets tab. This will mark the timesheet review task as completed and let you mark the job as Closed without adding any timesheets.
The button will only be available if the job does not have any timesheets.
Usage
Usage records connect operational consumption or asset use to the job. The Usage tab becomes available after the job is completed and includes equipment, vehicles, and consumables that need review.
Use the Usage tab after completion to confirm what was used on the job. Completed jobs lock equipment, vehicles, and consumables from further assignment changes, so usage review is where teams confirm or correct the reviewed records.
To proceed with usage:
- Complete the job and assign the usage review task to the right user.
- Open the job and select Usage.
- Review the usage summary to see which categories still need review.
- Review equipment usage and confirm the assigned items or quantities.
- Review vehicle usage and confirm vehicle records are accurate.
- Review consumable usage and confirm quantities consumed on the job.
- Complete the usage task when equipment, vehicle, and consumable review is done.
Activity
Activity history helps users understand what changed on the job and when. Review activity when a job has conflicting information, unexpected status changes, or questions about who updated the record.
Use the Activity tab when you need an audit trail for the job.
To proceed with activity review:
- Open the job and select Activity.
- Review recent changes first when troubleshooting a status, assignment, document, timesheet, usage, or invoice question.
- Compare the activity entry with the job’s current tabs when something looks wrong.
- Use activity history to understand who changed the job and when the change happened.
- Return to the relevant job tab to make any allowed correction.
Review invoices, timesheets, usage, documents, and activity before closing out a job so downstream teams have accurate information. When all job tasks are complete, FieldWRX can prompt users to close the job.
Close a Job
Complete a job when field work is finished. Closing a job is the final operational step after the review work is done.
Before marking a job Completed, confirm:
- Start date/time and finish date/time are correct.
- Finish date/time is later than the start date/time.
- Invoice, timesheet, and usage assignees are selected.
Before closing the job, confirm:
- The status accurately reflects the work outcome.
- Required documents are attached.
- Invoices, timesheets, and usage are reviewed.
- Notes or activity history explain any exceptions.
- Billing or payroll teams have the information they need.
Completed jobs lock equipment, consumables, and vehicles from further changes. Timesheets can still be added after completion when personnel was missed. Cancelled jobs are read-only and cannot be modified further.
Completed and closed job records support Billing, Payroll, Alerts, and Reports, so closeout quality matters.